Page History
| Excerpt | ||||||
|---|---|---|---|---|---|---|
WProofreader is a multilingual proofreading tool for web applications. It enables grammar and spell check combining spelling and grammar suggestions while you type or work with your text in a dedicated dialog. WProofreader meets the accessibility standards of the W3C Web Accessibility Initiative (WAI) and the Web Content Accessibility Guidelines (WCAG), in particular:particular WCAG 2.1 , and also Section 508. accessibility standards.Thus, all web application users, regardless of the limitations they might be facing, can access the main WProofreader features via a keyboard only, thus interacting with it can be more effective and easier. Below is an overview of the keyboard commands you can use to proofread your texts, navigate between the spelling and grammar suggestions, add words to a personal user dictionary, and customize WProofreader settings.
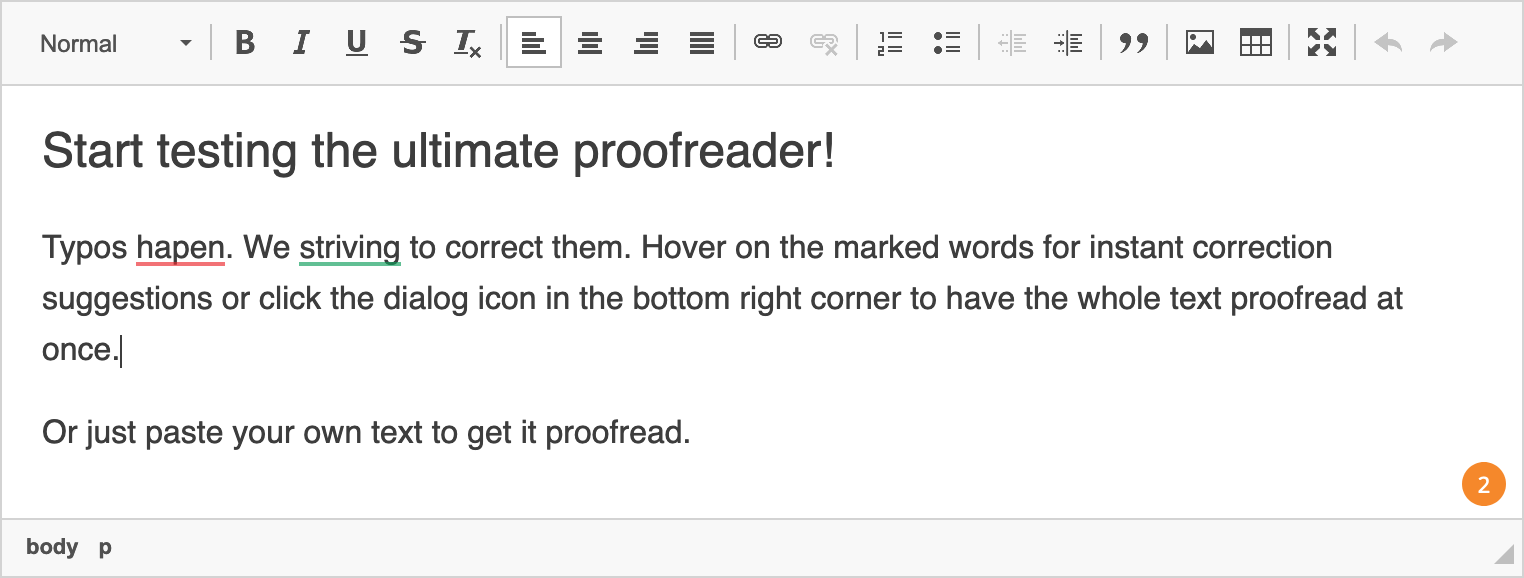
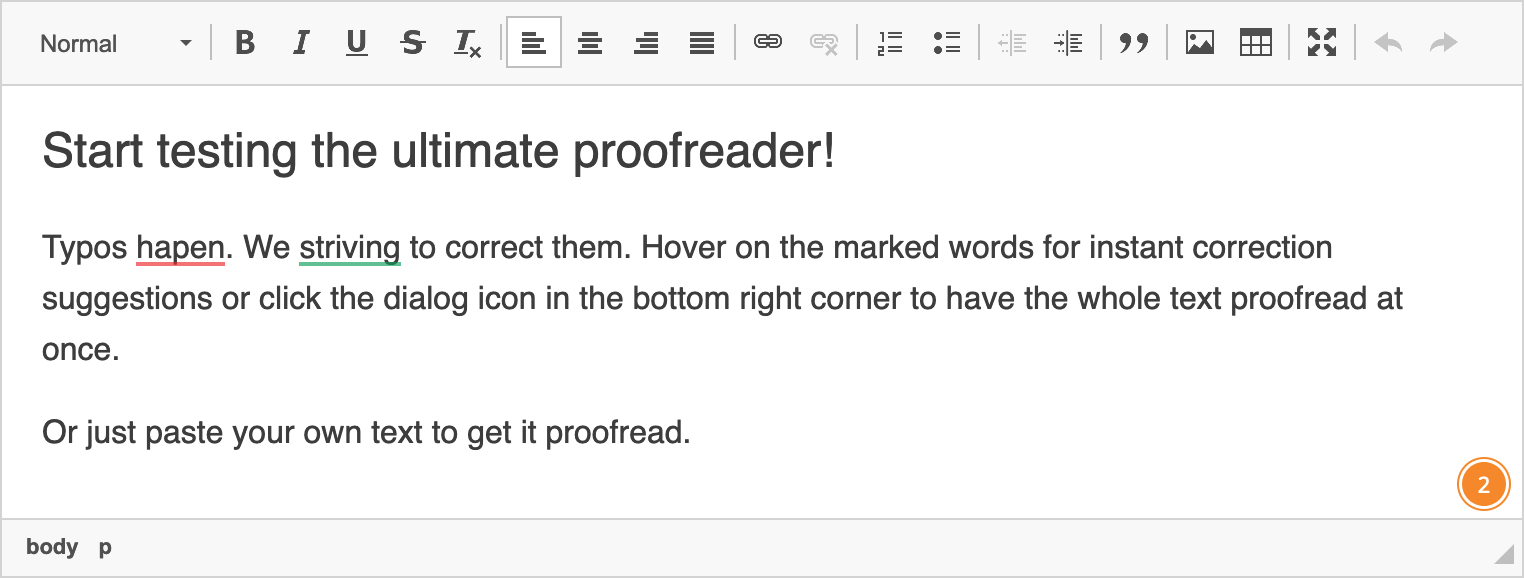
Proofreading your text while you typeAs you type your text in a web app with integrated WProofreader, it tries to suggest grammar and spelling suggestions for you on-the-fly and shows the number of discovered issues in the badge in the lower-right part of the editor screen. If no spelling issues are found, the badge shows the tick sign inside. New screenshot TBA
The total number Number of issues found is displayed in the badgeUse the commands in table below to navigate between the underlined issues found. | ||||||
| Keyboard Command | Description | |||||
| Tab | Move between the screen elements. The selected element is highlighted. | |||||
| Shift + Tab | Return to the previous element. |
| Note |
|---|
On MacOS laptops, only Space can be used to open the list of languages. However, this depends a lot on the system preferences. |
![]()
The badge view with Language picker enabled.Badge menu. Settings button is highlighted
Use the commands in table below to access more WProofreader options.
| Keyboard Commandcommand | Description |
|---|---|
| Left/Right arrow key | Move between the items. |
| Enter/Space | Select the Turn the WProofreader off Disable / Enable / Settings / Proofread in dialog / Languages mode. |
| Escape | Exit the menu. |
Proofreading in a
Dialogdialog
To access WProofreader dialog in access Proofread in dialog from as you type modedialog:
- Press the Tab key to highlight the badge icon and then press Enter or Space to display the badge actions.
- Press the Left/Right arrow key to navigate to the WProofreader icon Proofread in dialog icon and press Enter or Space.
Use the commands in table below to proofread check your text, namely, view and accept or reject the grammar and spelling suggestions, and add words to a personal dictionary.
| Keyboard Commandcommand | Description |
|---|---|
| Left/Right arrow key | Move between the underlined words in the proofreading mode between problems -suggestions found. The selected problem is highlighted. Return to previous underlined element. |
Up/Down arrow key | Navigate inside the suggestion area:
|
| Enter/Space |
|
New screenshot TBA
When a spelling issue problem is active, and you use Up or Down arrow keys, you can navigate to Dictionary Add word and Ignore all buttons and add a word to a personal dictionary or ignore the issue respectively.
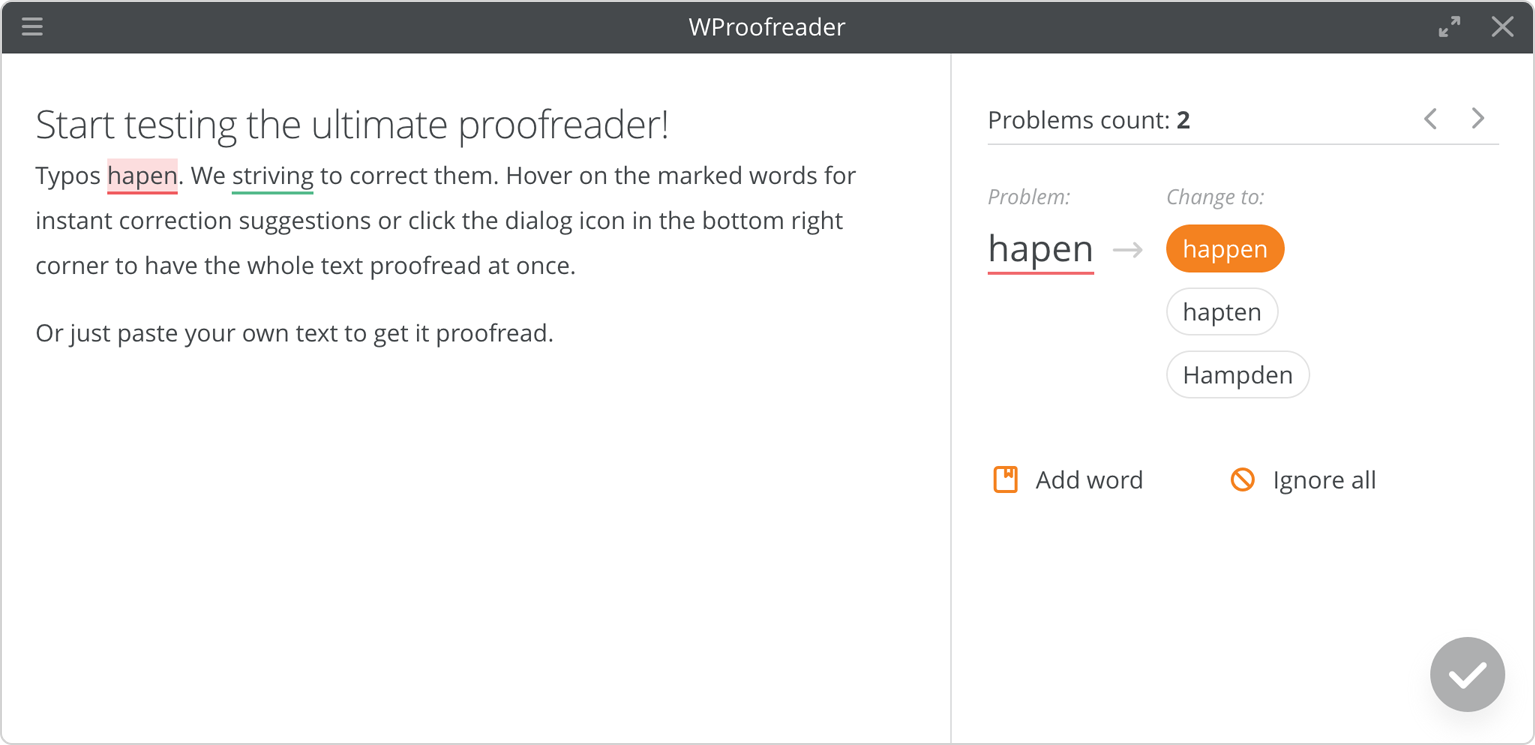
The view of the Proofread in dialog mode.
Changing WProofreaderSettings
You can access and change WProofreader settings in the Settings dialog. To access this dialog from the as you type mode:
- Press the Tab key to highlight the badge icon and then press Enter or Space to display the badge actions.
- Press the Left/Right arrow key to navigate to the Settings icon and press Enter or Space to open the Settings dialog.
![]()
The WProofreader badge. The Settings icon is selected.
You can alternatively access WProofreader settings Settings while proofreading your text in a dialog. To do so, press Tab continuously until you focus on the Settings![]() icon and it gets highlighted and then press Enter or Space.
icon and it gets highlighted and then press Enter or Space.
New screenshot TBA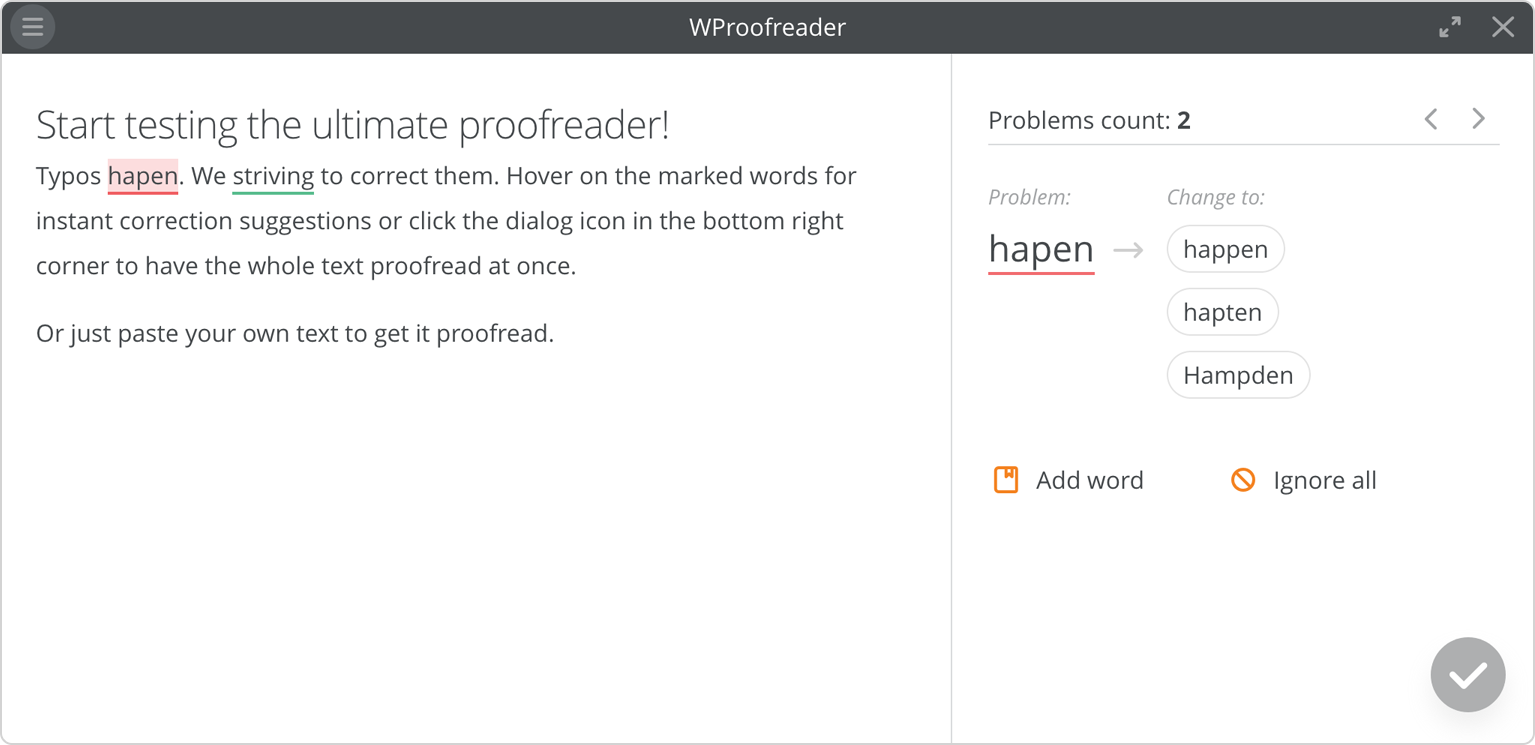
The WProofreader Settings dialog, Options tab is selected.dialog. The Settings icon is selected in the top-left corner.
Options
To access and change modify WProofreader options:
Open WProofreader Settings dialog.
Press the Tab key until the Options section is selected.
PressThen press Enter or Space and again Tab to navigate to the options area.
Use the Tab / Shift+Tab keys to navigate to the desired option and then press Space to select or deselect the desired option. The changes are applied automatically.
Press the Tab and Enter to select Options first.

The Settings dialog with the Options tab selected.
Keyboard command | CommandDescription | |
Tab/Shift + Tab | Move continuously across the Options tab settings. | |
Enter/Space | Open/select the menu group. |
To change the options of the selected Options dialog group, use the commands in table below.
| Keyboard Commandcommand | Description |
|---|---|
| Tab/Shift + Tab | Switch through the options. |
Space | Select or deselect the desired option. Remember to focus on the option before selecting or deselecting it. |
New screenshot TBA
Selecting an option
Selecting the Desired Language for Proofreading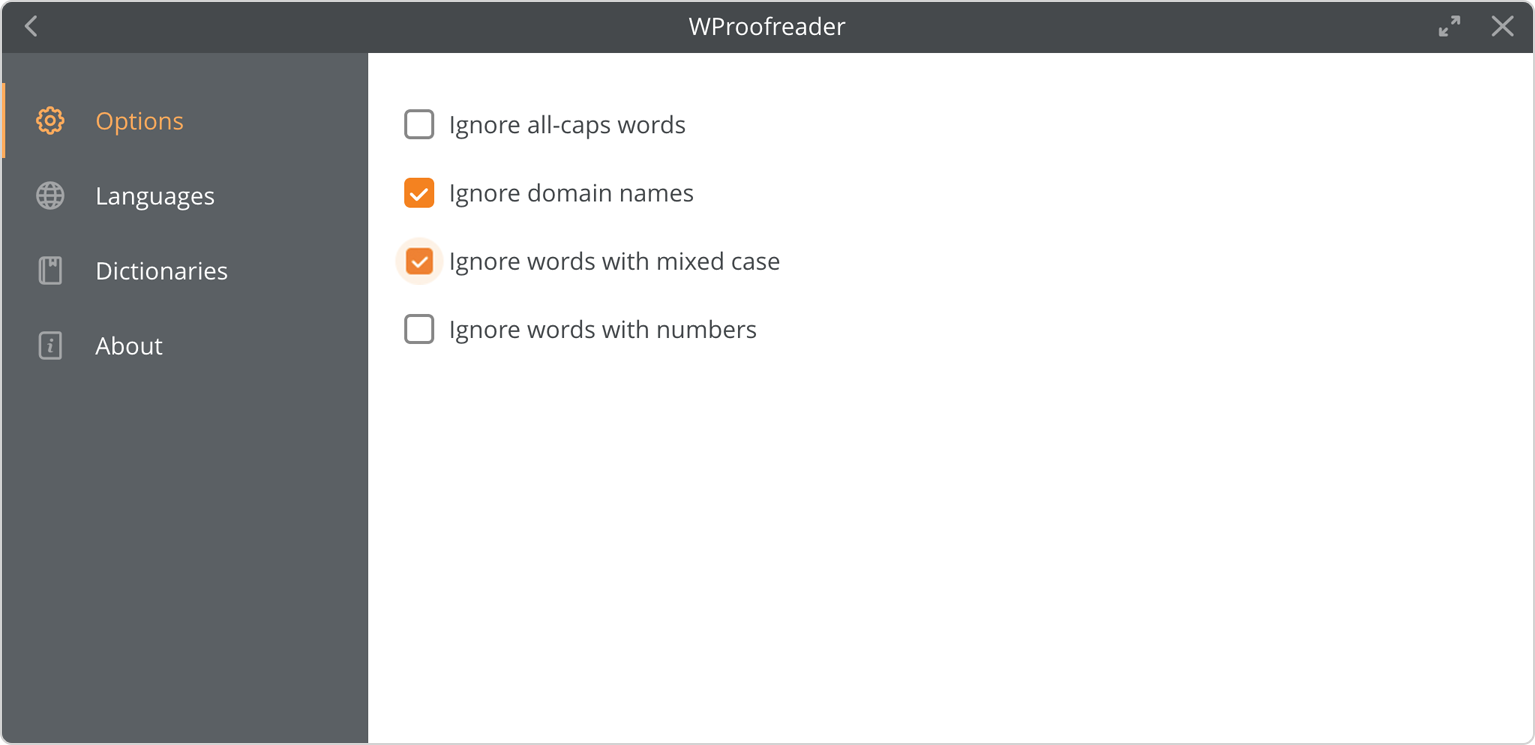
The Options tab. Ignore words with mixed case was selected.
Languages
To specify the currently used language for proofreading (spelling and grammar check):
- Open WProofreader Open Settings dialog.
- Press Tab and Enter or Space to select Options first and then repeatedly press the Down arrow key until the Languages section is selected. Then press Enter or Space and again Tab.
- Use the Up/Down keys to navigate to and select the desired language and then press Escape to save the changes . The changes are applied automatically.
- Press Escape to and exit the dialog.
New screenshot TBA
Working with Personal User Dictionaries
To customize personal user dictionaries features, navigate to Dictionaries settings area.
New screenshot TBA
Dictionaries tab options
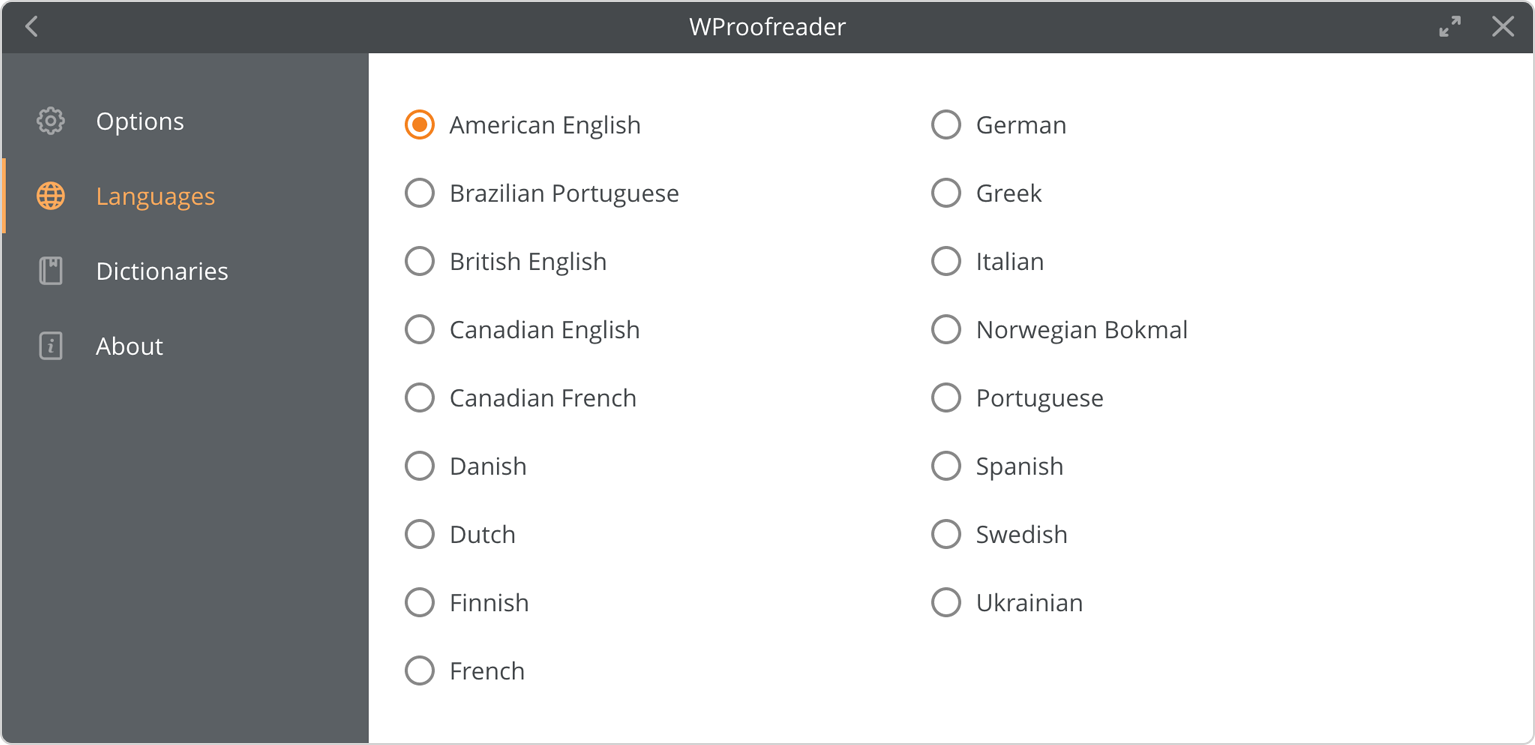
The Languages tab is selected.
Dictionaries
Use the Dictionaries settings to create a new dictionary Here you can create new dictionaries or connect an already existing one, and also add or remove the words from the dictionaries.

The Dictionaries tab is selected.
To create a new personal user dictionary or connect to the already existing one:
- Open Settings dialog.
- Press Tab and Enter or Space to select Options first and then . Then repeatedly press the Down arrow key until the Dictionaries section is highlighted and then press Enter or Space.
- Press Tab to navigate to the Enter a dictionary name field and type a dictionary name then press Tab to select either Connect or Create buttons respectively.
Depending on an action made either a new dictionary is created or an already existing one is connected.
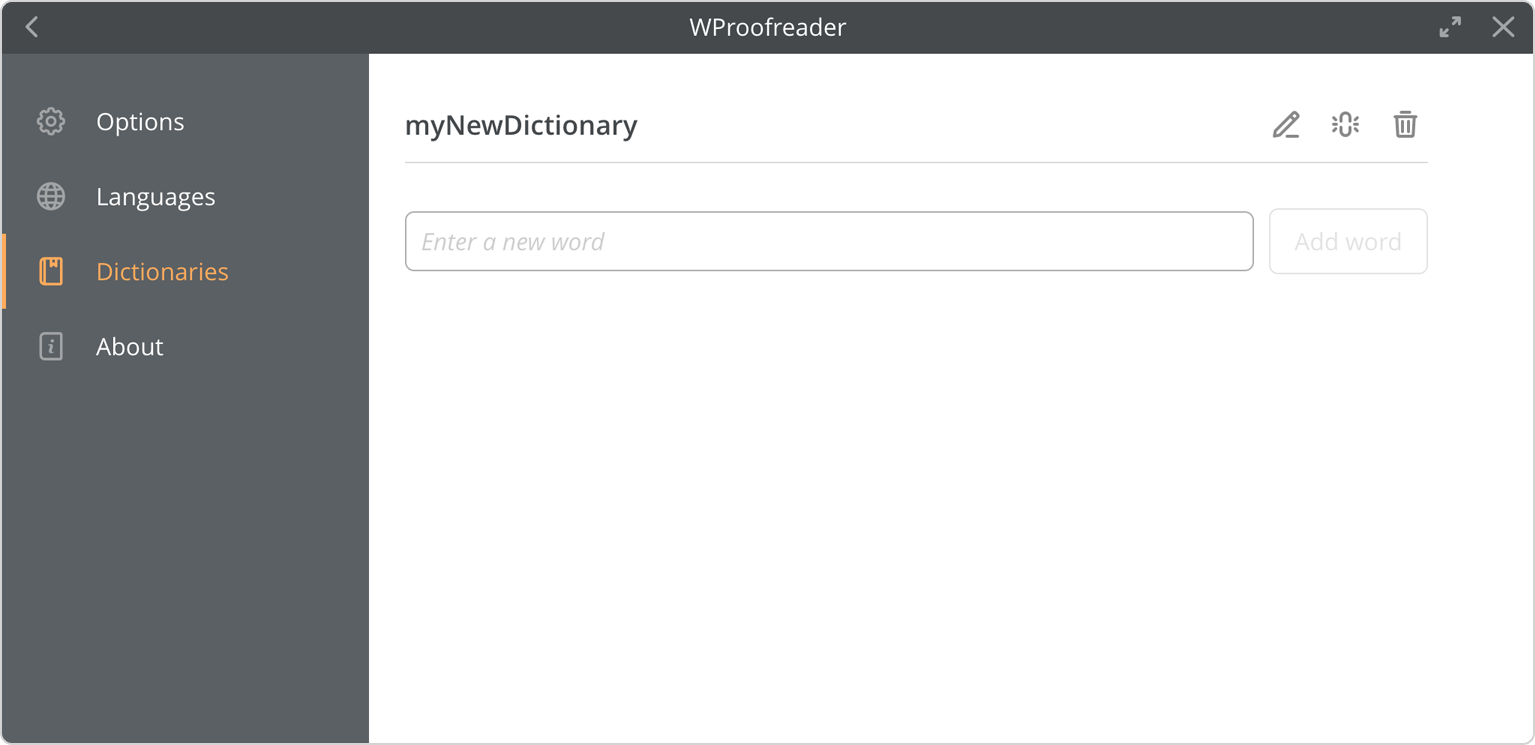
The Dictionaries tab. A new dictionary is created.
To add a new word to a personal user dictionary:
- In the Enter a new word area, type the desired word.
- Press Enter or press Tab to navigate to the Add word button and press Enter or Space to confirm the action.
You will see a pop-up message confirming that the word is added to the dictionary.
New screenshot TBA
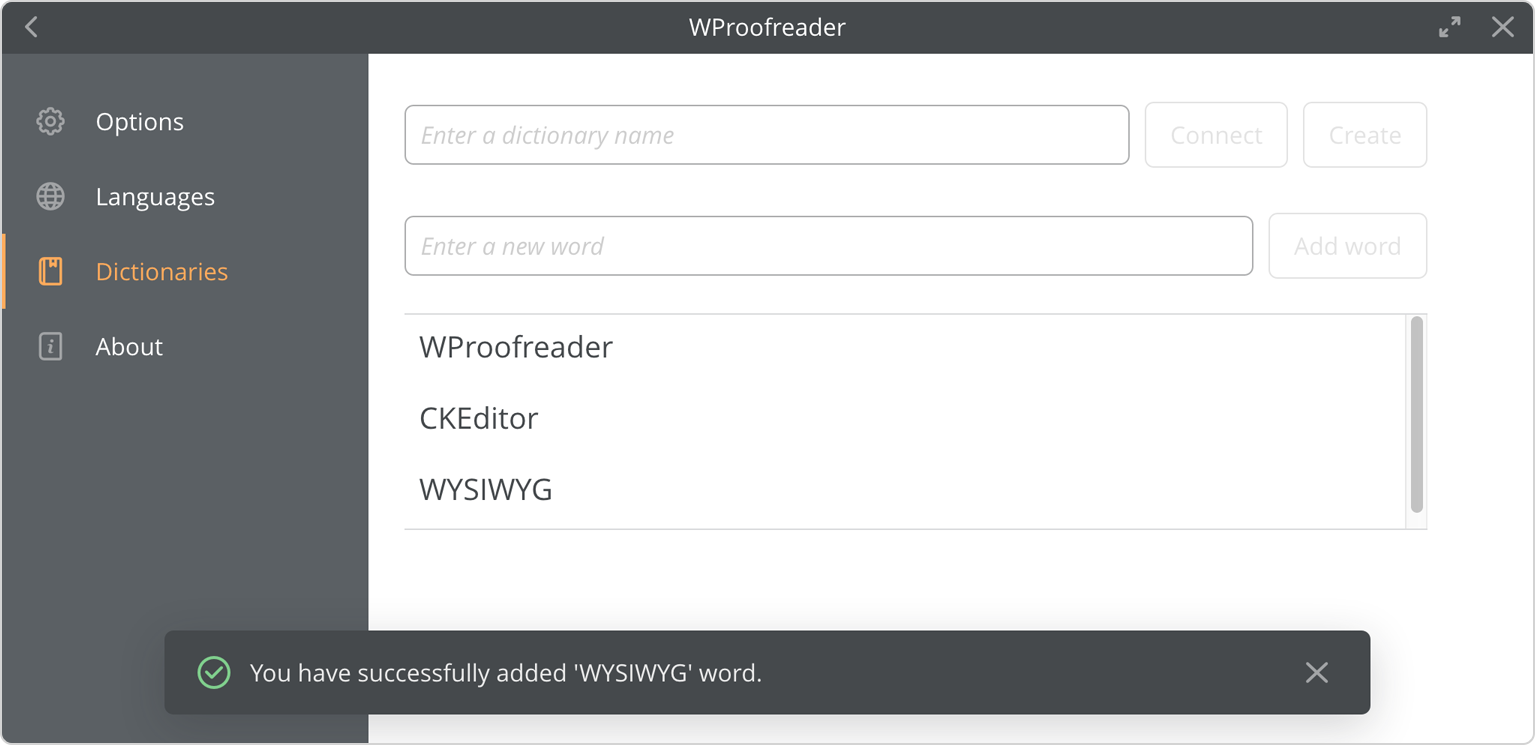
Adding a word to the dictionary.
To delete the already existing words from the To edit, i.e. to delete the list of already existing words in a dictionary:
- Press Up/Down arrow keys to navigate to the desired words, select the desired word. As you move between the words, the Bin
 icon is highlighted near the selected word.
 - Press Enter button.
The word is deleted from the dictionary, and the notification appears in the lower part of Settings dialog.of Settings dialog.
To rename a dictionary:
- Press the Tab continuously to select the Rename
 icon near the selected dictionary name.
 - Type the desired new name and press Enter or press Tab to select the Rename button and press Enter. The dictionary will be renamed.
To disconnect the dictionary:
- Press the Tab continuously to select the Disconnect
 icon near the selected dictionary name and press Enter or Space.
The dictionary is disconnected, and notification message appears in the lower part of Settings dialog.
About
To see the information about the version of WProofreader you are currently using, navigate to the About area of the Settings dialog. To do so:
- Open Settings dialog.
- Press Tab and Enter to select Options first and then repeatedly press the Down arrow key until the the About section is highlighted and then press Enter or Space.