Page History
1. Overview
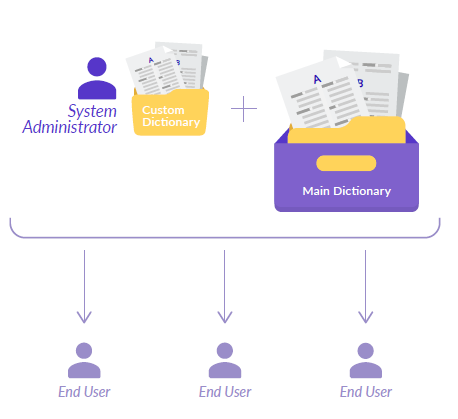
The Global custom dictionary is a special mechanism that allows creating company-wide dictionaries that are intended to extend the vocabulary of the standard dictionary with custom words specific to your industry, domain, etc. All All the words added to the Custom Dictionary a custom dictionary will be available for all for all users of the system withing a web application within a company.
Custom dictionaries for Cloud clients customers are located saved and stored on the WebSpellChecker Cloud servers. They can Such dictionaries can be created and modified only by a person who has is authorized to access to the WebSpellChecker application in the admin panel, who can add words to the Custom dictionary. account panel on the webspellchecker.com website.
| Panel | ||||
|---|---|---|---|---|
|
2. Availability
The custom dictionary functionality is available for the Paid, Trial and Free Froala Editor Customers. Each Custom Dictionary is tied to the company customer ID, which works for an unlimited number of domains and subdomains.
3. Create Custom Dictionary
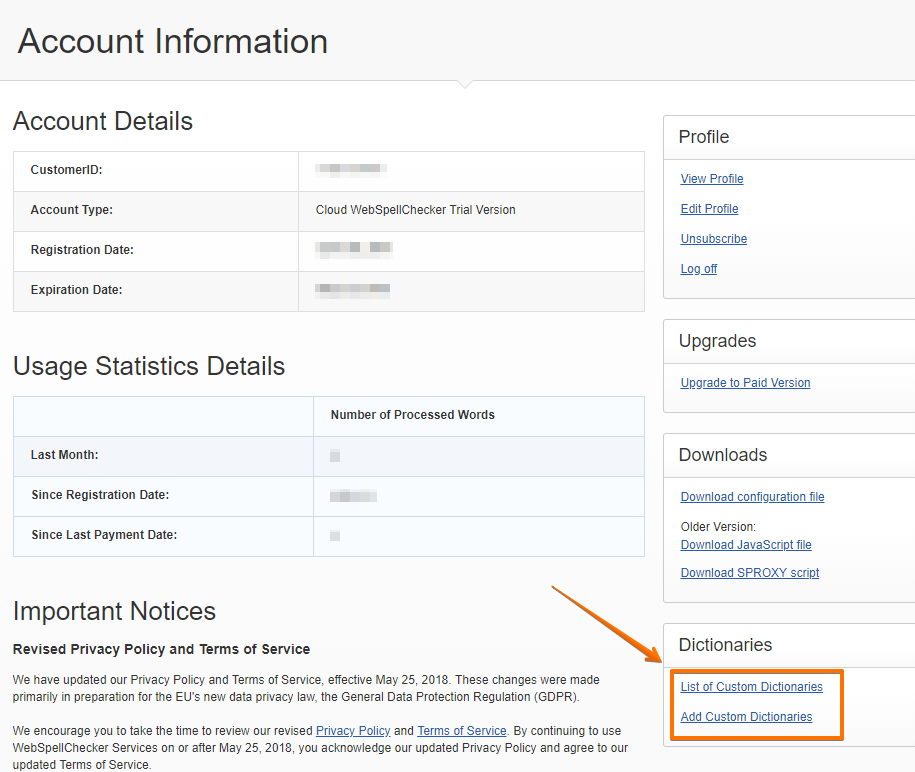
- Sign in to your account section at www.webspellchecker.net, using your customer ID and password to login into the account. The following information is provided via email after subscription.
- Go to the Dictionaries tab and choose "Add Custom Dictionary"
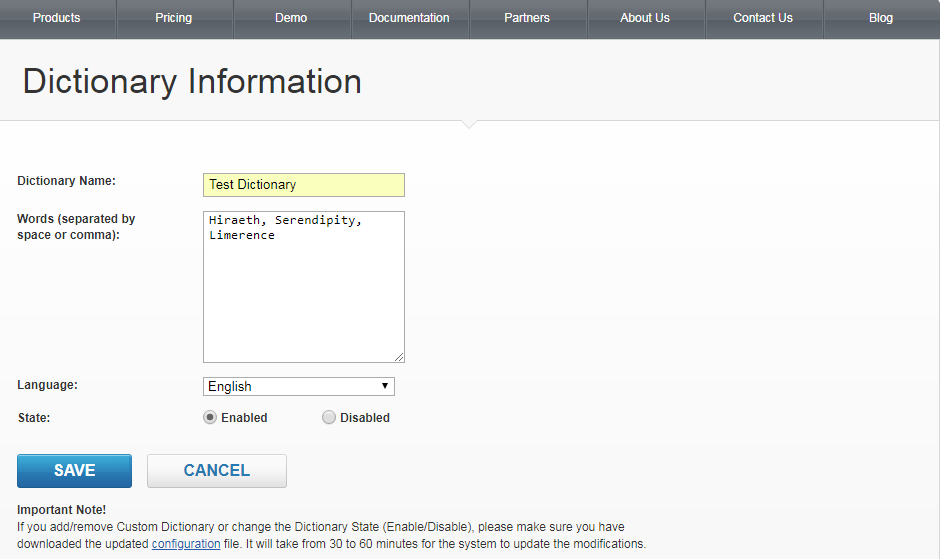
3. Fill in the form:
- Enter dictionary name and words for this dictionary separated by space or comma
- Select language
- Select state of a dictionary
- Click Save button
4. Download the updated configuration file from the same page just clicking to "configuration"

5. Update your encrypted Customer ID in the configuration
6. Clean the browser cache
4. Edit Custom Dictionary
- Sign in to your account section at www.webspellchecker.net, using your customer ID and password to login into the account. The following information is provided via email after subscription.
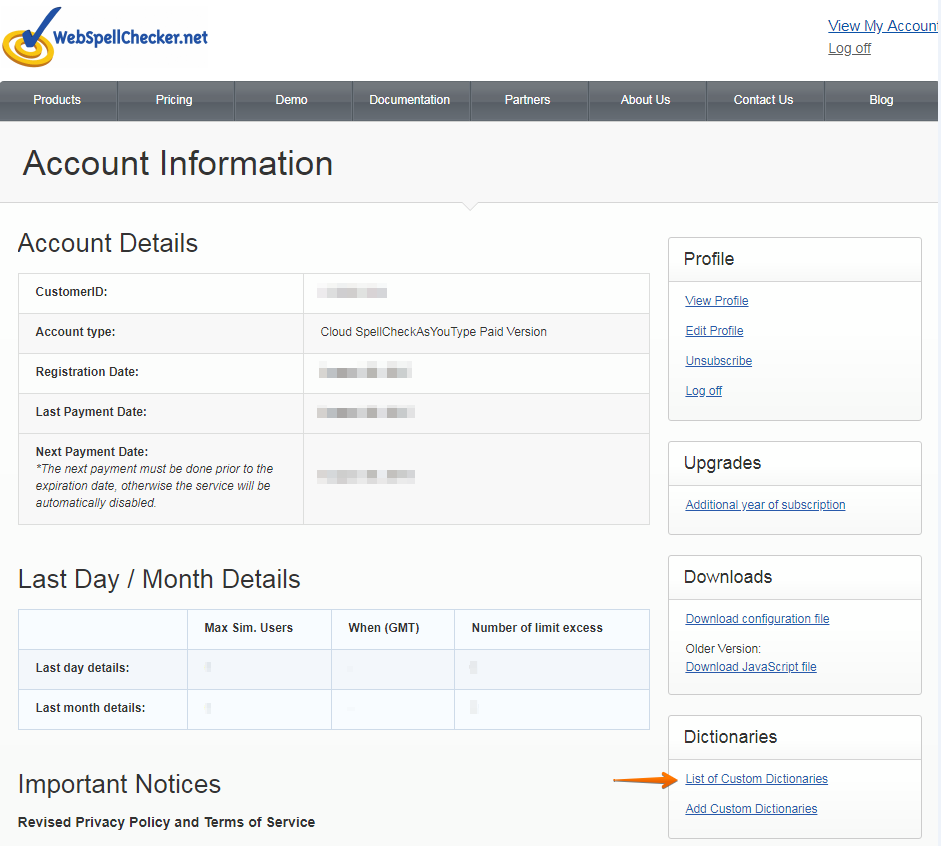
- Go to the Dictionaries tab and choose "List of Custom Dictionaries"
- Select the dictionary you want to edit
- Click Edit
- Change fields you need to edit
- Click Save button
- Download the updated configuration file
- Update your encrypted Customer ID in the configuration
- Clean the browser cache
5. Delete Custom Dictionary
- Sign in to your account section at www.webspellchecker.net, using your customer ID and password to login into the account. The following information is provided via email after subscription.
- Go to the Dictionaries tab and choose "List of Custom Dictionaries"
- Select the dictionary you want to edit
- Click Delete and confirm that you want to delete the Dictionary
- Download the updated configuration file
- Update your encrypted Customer ID in the configuration
- Clean the browser cache
Custom dictionaries are available for all customers who have either trial or paid subscription to WebSpellChecker Cloud Services.
| Tip |
|---|
Good to know:
|
3. Getting started with custom dictionaries
To get started with the custom dictionary functionality:
| Excerpt Include | ||||||
|---|---|---|---|---|---|---|
|
- Locate the Dictionaries section on the main page of your account and add a new dictionary. As soon as new dictionary is added, it will be displayed on the list of your custom dictionaries.
4. Create custom dictionary
4.1. Navigate to the Dictionaries tab.
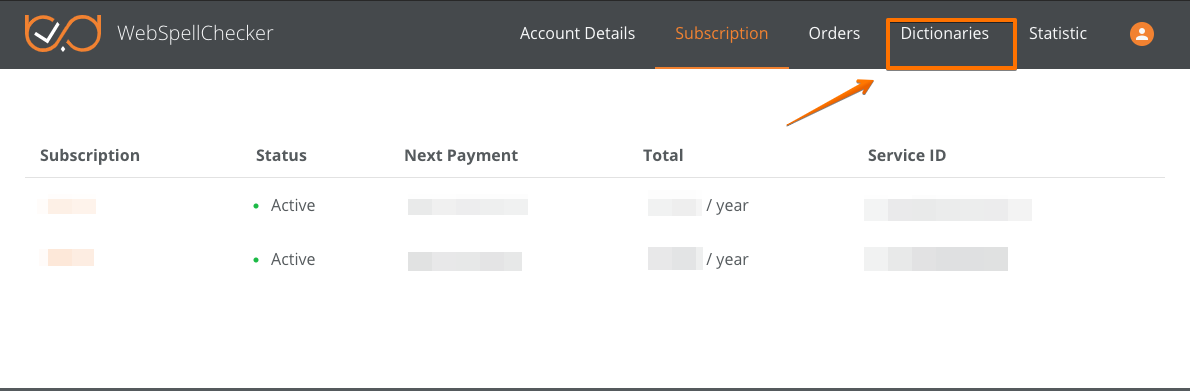
4.2. Under your subscription section, click Add New Dictionary button to create a new dictionary.
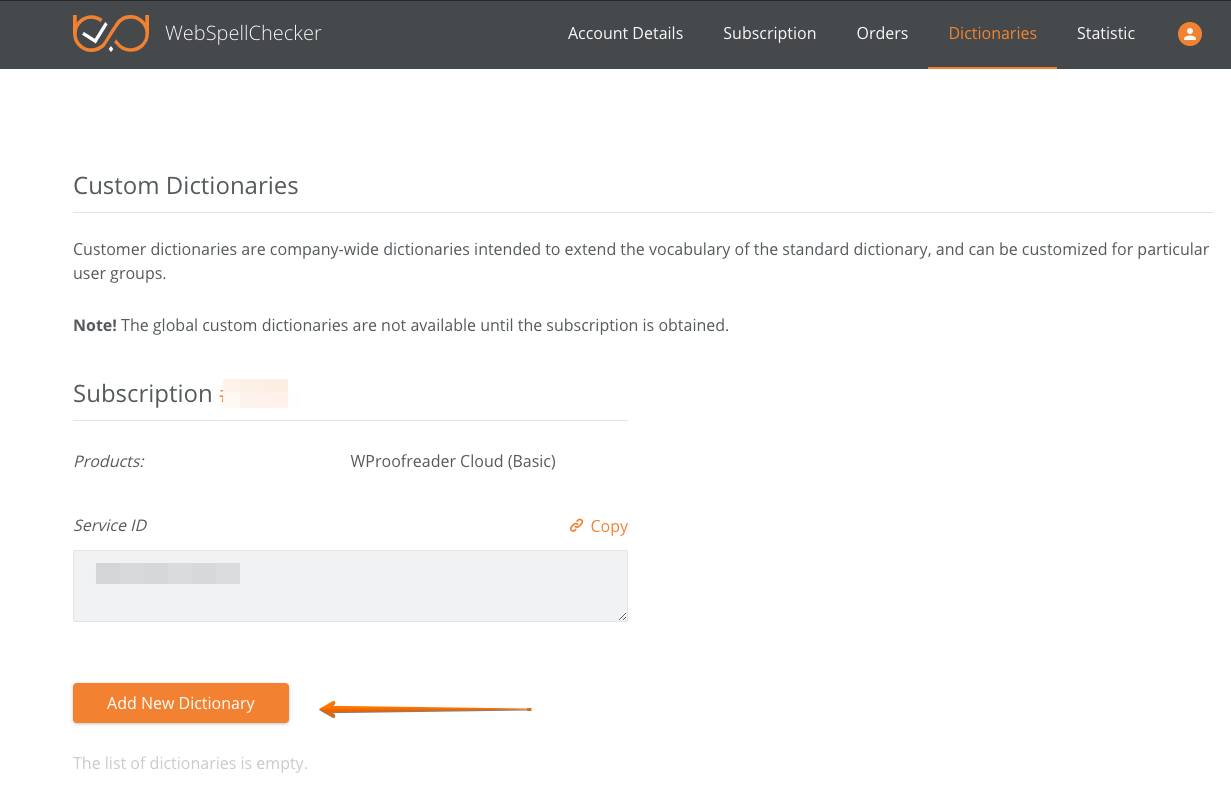
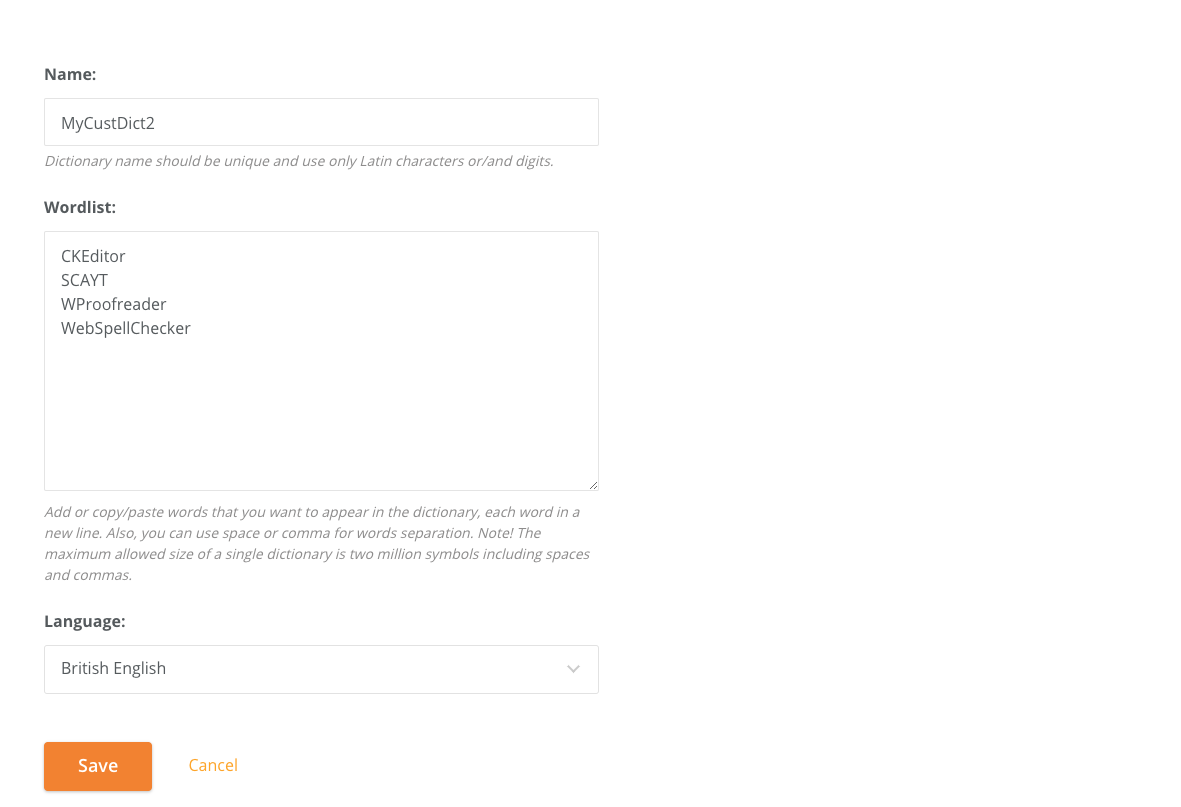
4.3. Fill in all the necessary fields to create a new custom dictionary and click Create.
- Type a dictionary name (the dictionary name should be unique and use only Latin characters or/and digits);
- Add or copy/paste the words separated by space or comma that you want to appear in the dictionary.
| Note |
|---|
Each unit in a dictionary is a separate word which can contain language-specific letters and digits. Don't use any specific symbols (e.g. math symbols) in the dictionary as it will fail to compile and won't work eventually. |
- Select a language to apply a new custom dictionary for. The words from this custom dictionary will be used to extend the default wordlist of a chosen language dictionary.

| Anchor | ||||
|---|---|---|---|---|
|
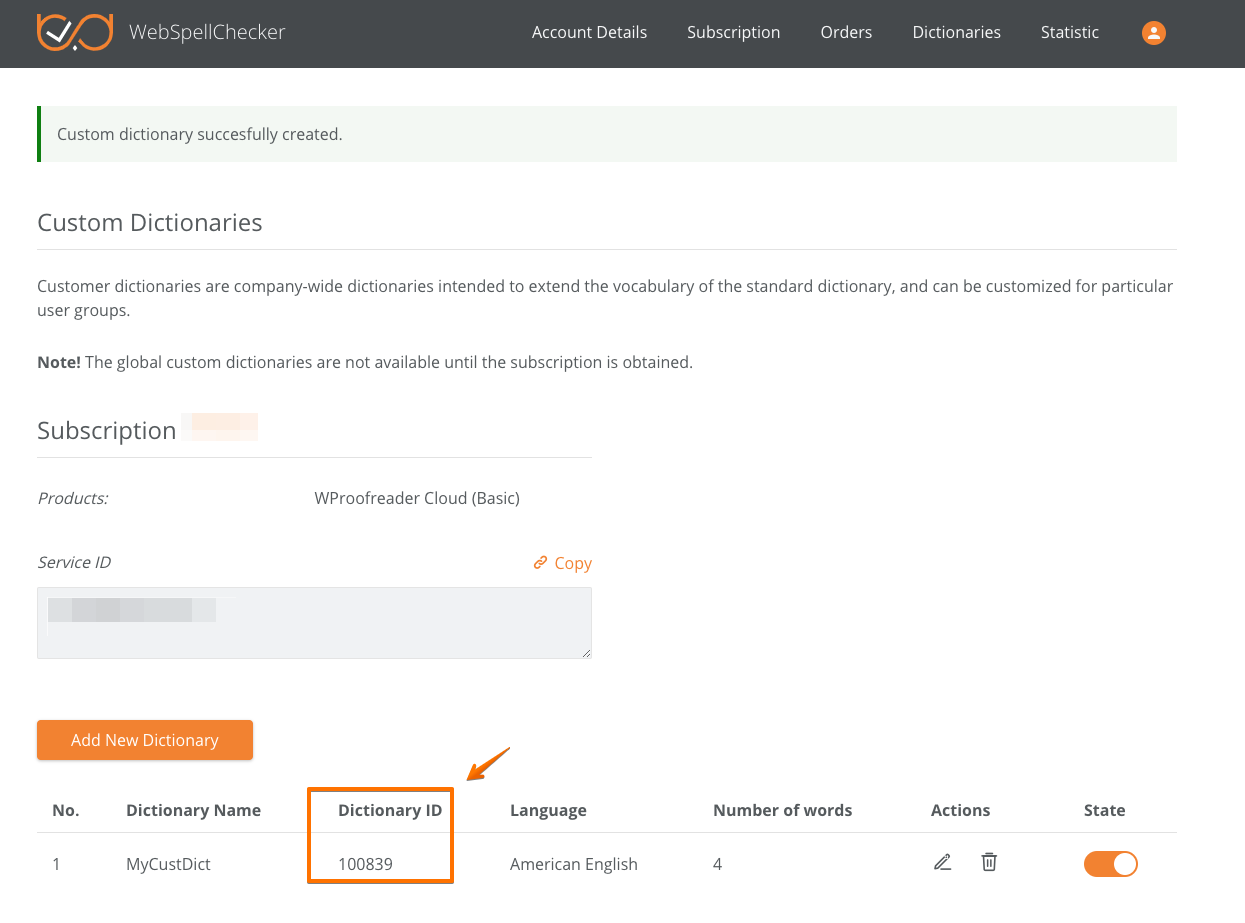
- Once the dictionary is created, a unique dictionary ID will be assigned to your custom dictionary as shown below.
| Excerpt | ||||||
|---|---|---|---|---|---|---|
|
| Code Block | ||||||
|---|---|---|---|---|---|---|
| ||||||
<script type="text/javascript" data-wsc-autosearch="true" src="http://svc.webspellchecker.net/spellcheck31/wscbundle/wscbundle.js"></script>

<script>
    window.WEBSPELLCHECKER_CONFIG = {
        serviceId: 'your-service-ID',
        lang: 'en_US',
		customDictionaryIds: '100839'
    };
</script> |
4.4. Verify if the custom dictionary functionality works correctly:
- Before trying to test a new custom dictionary, it is strongly recommended to clean your browser cache.
- Go to your web page and enter a sentence or a list of words that have been added to a new custom dictionary. The words that are present in your custom dictionary should be considered as correct. Moreover, if you try to misspell any of these words, you should get the correct word as a suggestion for correction in the list of suggestions.
5. Edit custom dictionary
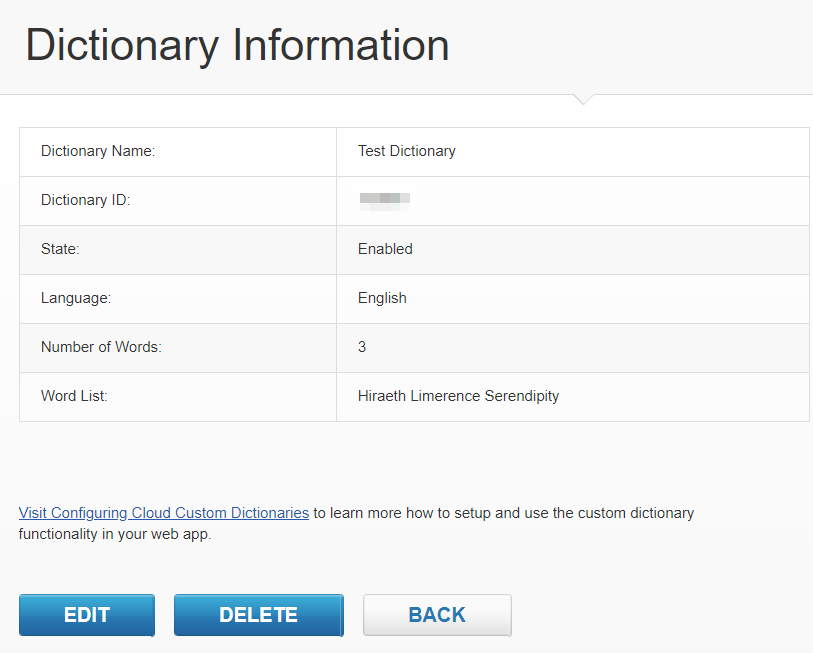
5.1. To edit a custom dictionary, navigate to the Dictionaries section and, under your subscription section, select a dictionary you want to edit (Actions –> Edit icon).
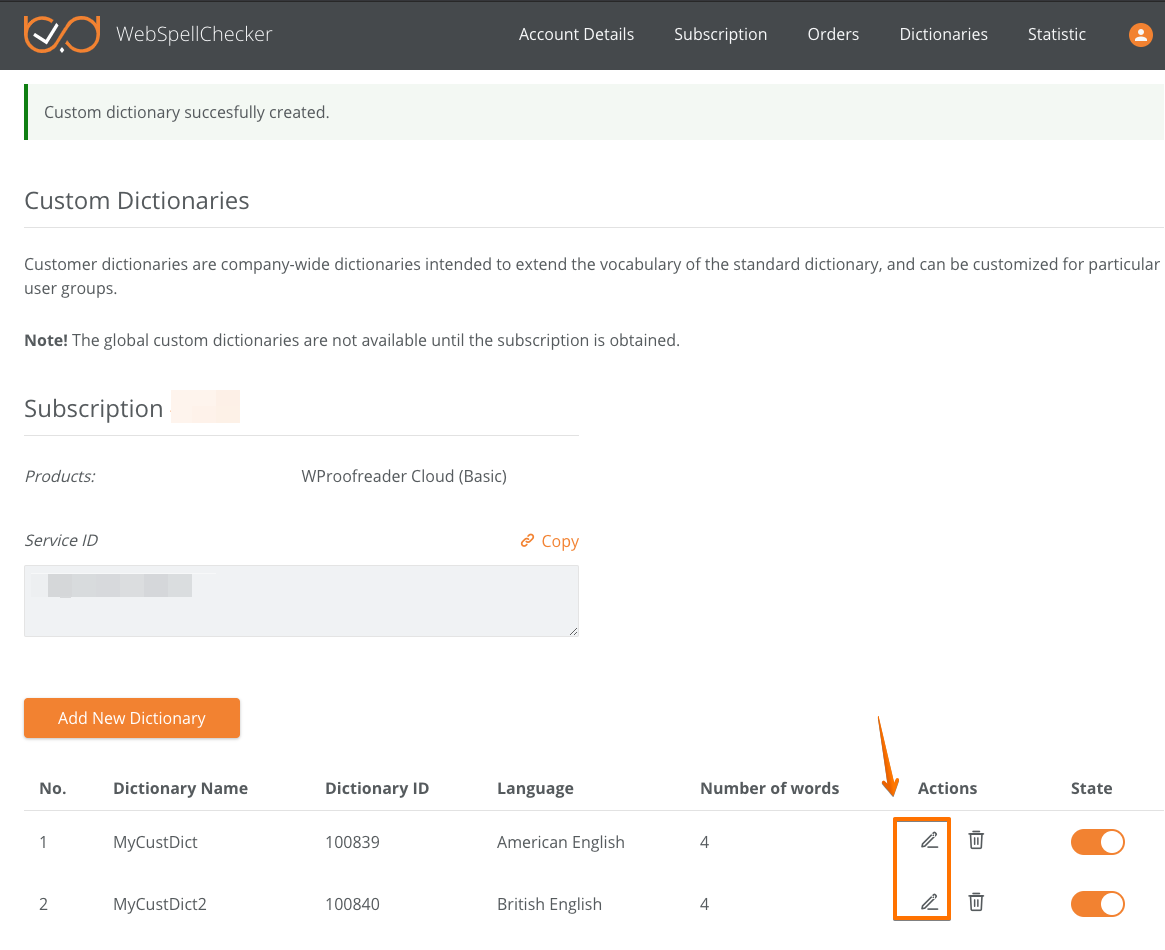
5.2. Modify the required fields (e.g. add new words) and click Save.
6. Delete custom dictionary
- Navigate to the Dictionaries section and select your subscription. Go to the list of the dictionaries under this subscription.
- Select the dictionary you want to delete. Click the Delete icon.
- Apply the changes made to the service configuration on your web page or web app (see more details in section 4.3).