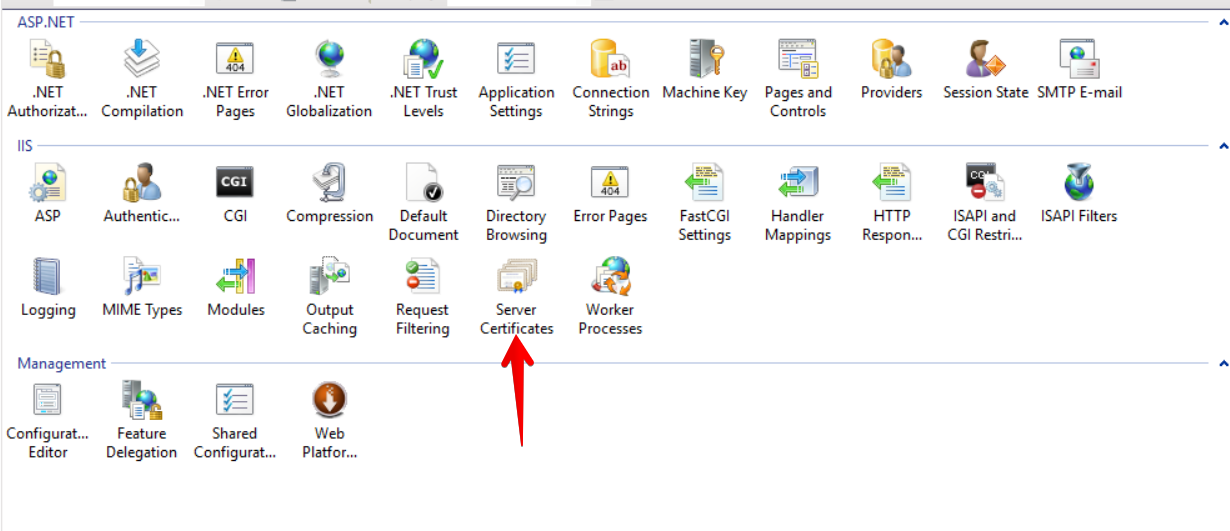
1. Go to IIS settings. Open Server Certificates.
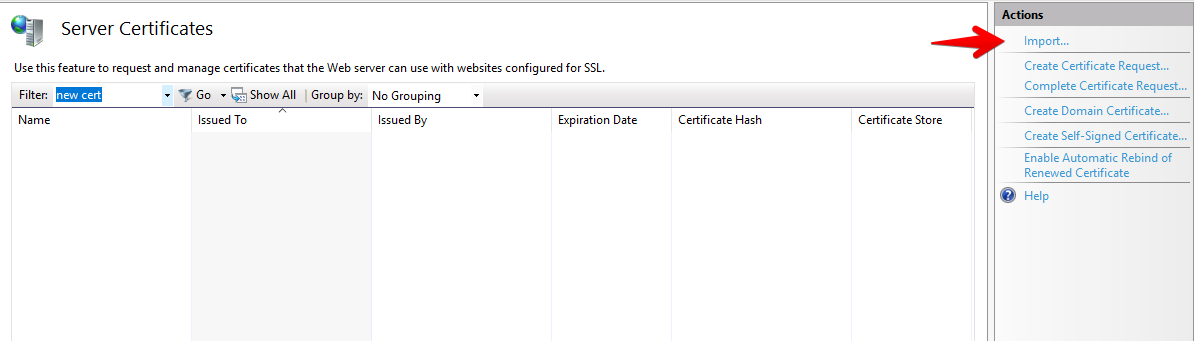
2. Navigate to Actions section in the Server Certificates view. There is an Import... option.
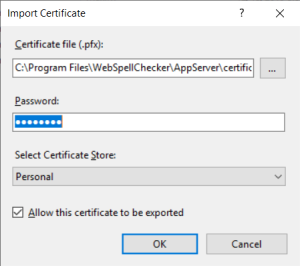
3. Select a certificate (*.pfx) that you want to import and enter your password if your certificate is password-protected.
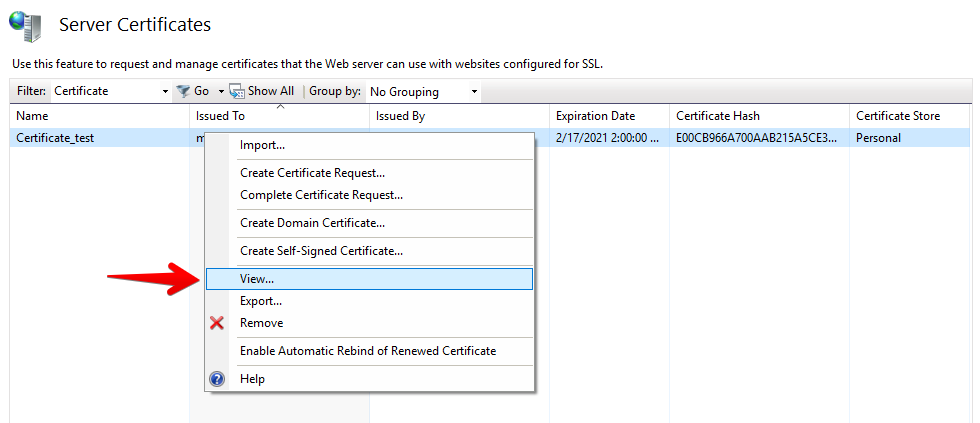
4. In case of the success operation, you will find a certificate listed on the list of Server Certificates.

5. To check the common name (CN) of your certificate right-click on the certificate and select View...
On the pop-up with the Certificate infomation, open Details tab. Find the Issuer infomation.

6. This is the CN name that you need to specify during the installaton of WebSpellChecker.
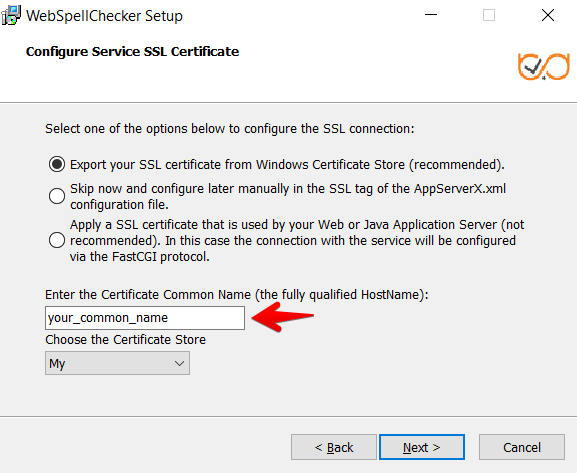
Alternatively, if WebSpellChecker is already installed, you can update this directly in AppServerX.xml file.
<SSLCertificateSource>STORE</SSLCertificateSource>
    <SSLCertificateStoreSettings>
    <!-- The Common Name represents the server name protected by the SSL certificate (the fully qualified HostName). -->
    <SSLCertificateCommonName>your_common_name</SSLCertificateCommonName>
    <!-- If specified, Windows machine certificate store is used. Otherwise, the user's certificate store is used.
    The default value  is true. -->
    <SSLCertificateUseMachineStore>true</SSLCertificateUseMachineStore>
    <!-- Possible values: MY (Personal), ROOT (Trusted Root Certification Authorities), TRUST (Enterprise Trust),
    CA (Intermediate Certification Authorities), USERDS (Active Directory User Object). The default value is MY. -->
<SSLCertificateStore>MY</SSLCertificateStore>