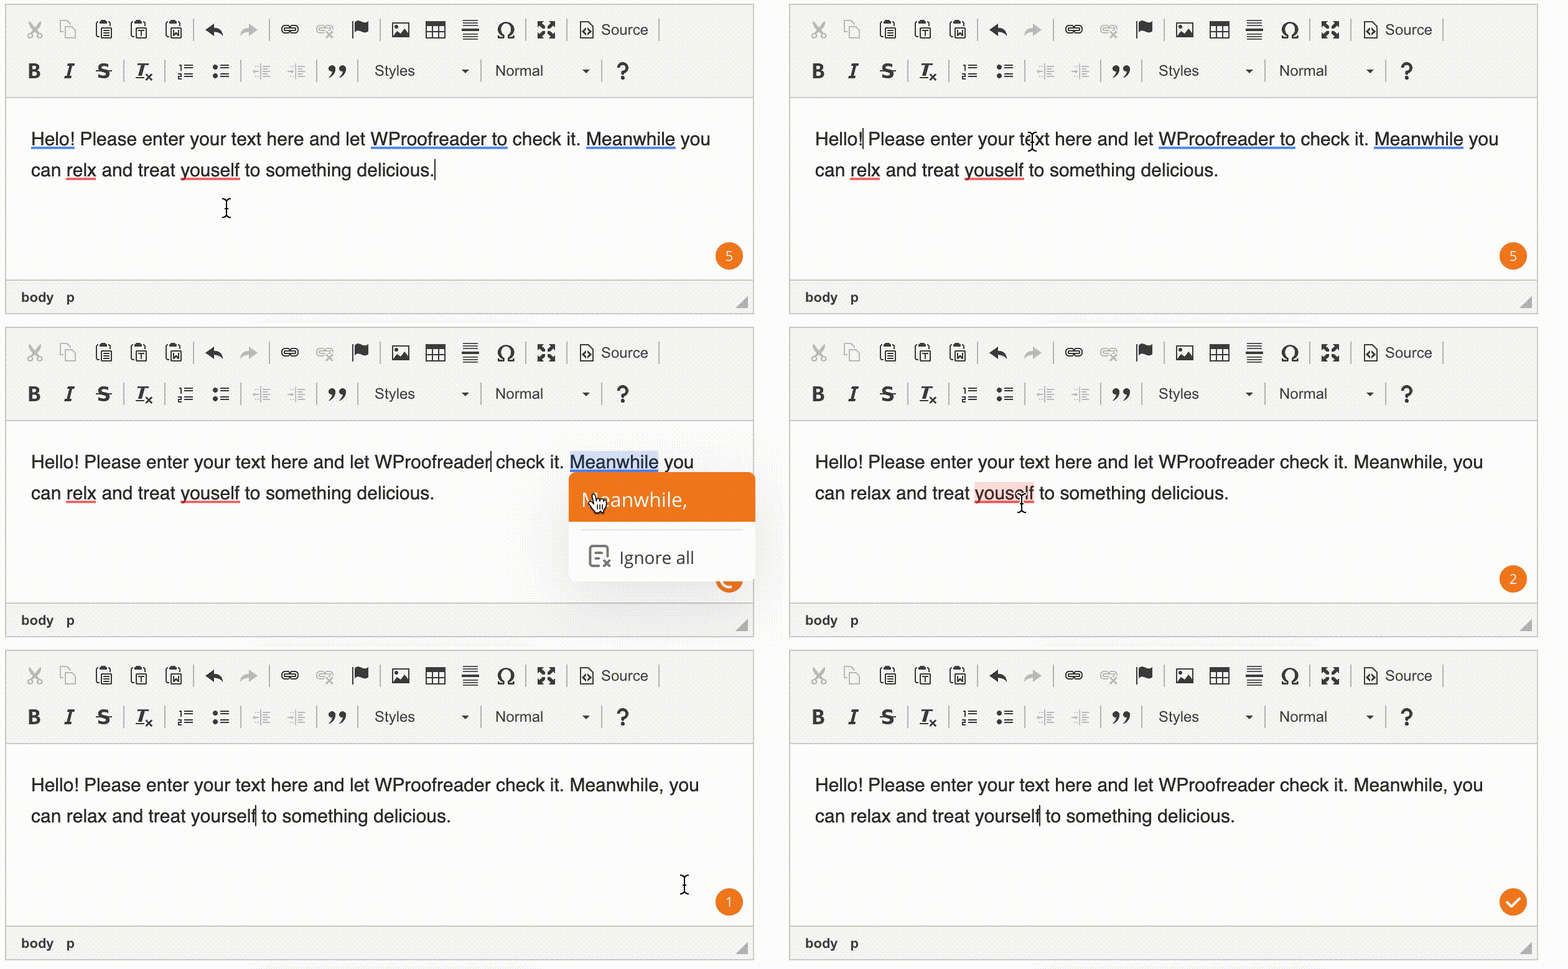
WProofreader add-on for rich text editors is a 2-in-1 solution that combines spell & grammar check as you type and in-dialog modes and can be conveniently integrated in any HTML editable tag or modern rich text editor (RTE). Check out the list of all supported integrations. WProofreader is compliant with the Web Content Accessibility Guidelines (WCAG) and Section 508 and comes along with keyboard navigation. Users with limited abilities can proofread, switch between the modes, tweak settings and complete other tasks using keyboard shortcuts only. This guide is for WProofreader users and developers integrating WProofreader into their clients’ infrastructure. Check the below keyboard commands to use WProofreader. WProofreader checks users’ texts in editable HTML tags and rich text editors for spelling, grammar, and punctuation errors while the user is typing. The orange badge in the bottom right corner of the text box displays the total number of grammar, spelling and punctuation issues found in the active element. If there are no issues, you can see the tick sign on the badge. Users can access more WProofreader features through the badge, in particular: Press Tab to navigate to the badge. You’ll see a badge highlighted with a circle around it. Then press Enter or Space to open the badge and switch to Proofread in dialog mode, the Settings dialog, toggle Proofreader options. On MacOS laptops, only Keyboard commands to access more WProofreader options: Keyboard command Description Move between items Close WProofreader menu Keyboard command Description Left/Right arrow key Move between items Enter/Space Escape Close WProofreader menu To switch to Proofread in dialog mode from the as-you-type mode, press Tab to highlight the badge. Then press Enter or Space to display the badge actions. Use the Left/Right arrow key to navigate to the Proofread in dialog icon and press Enter or Space. With the below commands, users can accept/ignore WProofreader suggestions, add words to dictionary. Keyboard command Description Left/Right arrow key Move between grammar and spelling issues found. The selected issue is highlighted. Up/Down arrow key Navigate inside the suggestion area: Enter/Space Accept a suggestion, confirm action. To access WProofreader settings, press Tab to highlight the badge. Then press Enter or Space to display the badge actions. Use the Left/Right arrow key to navigate to the Settings icon and press Enter or Space to open the Settings dialog. Also, you can access the Settings from the Proofread in dialog mode. Keep pressing Tab until you focus on the Settings icon. It will be highlighted. Then press Enter or Space. Use Tab to navigate between Ignore options in the Settings dialog. Select the desired option and press Space to enable/disable it. The changes are applied automatically. Keyboard command Description Tab/Shift + Tab Move between Ignore options forward or backward. Space Enable/disable the desired ignore option. Take the steps below to select a language for proofreading. In the Dictionaries settings, users can create new dictionaries, connect or delete existing ones, add or remove words from the dictionaries. To add a new word to a user dictionary, use Tab and navigate to the Enter a new word field. Type a new word and press Tab to move to the Add button. Confirm the action by pressing Space. Once the word is added, you’ll see a confirmation message “Word added”. To delete a word from the dictionary, use the Up/Down arrow key to move between words and choose a word you want to remove. Confirm the deletion by pressing Space or Enter. Once the word is deleted, you’ll see a confirmation message “Word deleted”. To rename the dictionary, navigate to Dictionary settings using Tab and select Rename from the list. Confirm the action by pressing Space/Enter. Once the dictionary is renamed, you’ll see a confirmation message “Dictionary renamed”. To disconnect the dictionary, navigate to Dictionary settings using Tab and select Disconnect from the list. Confirm the action by pressing Space or Enter. Once the dictionary is disconnected, you’ll see a confirmation message “Dictionary disconnected”. WProofreader version and copyright info is presented in the Settings dialog. You may find it useful when providing information about your system to our support team.Proofreading in the as you type mode
Accessing more features
Space can be used to open the list of languages. However, this depends a lot on the system preferences.← and → arrow keyEnter / Space Esc Proofread in dialog mode
Tweaking settings
Spelling ignore options
Language
Dictionary
Add word
Delete word
Rename dictionary
Disconnect dictionary
About
Privacy Policy![]() | Terms of Service
| Terms of Service![]()
©2024 WebSpellChecker LLC. All Rights Reserved.
